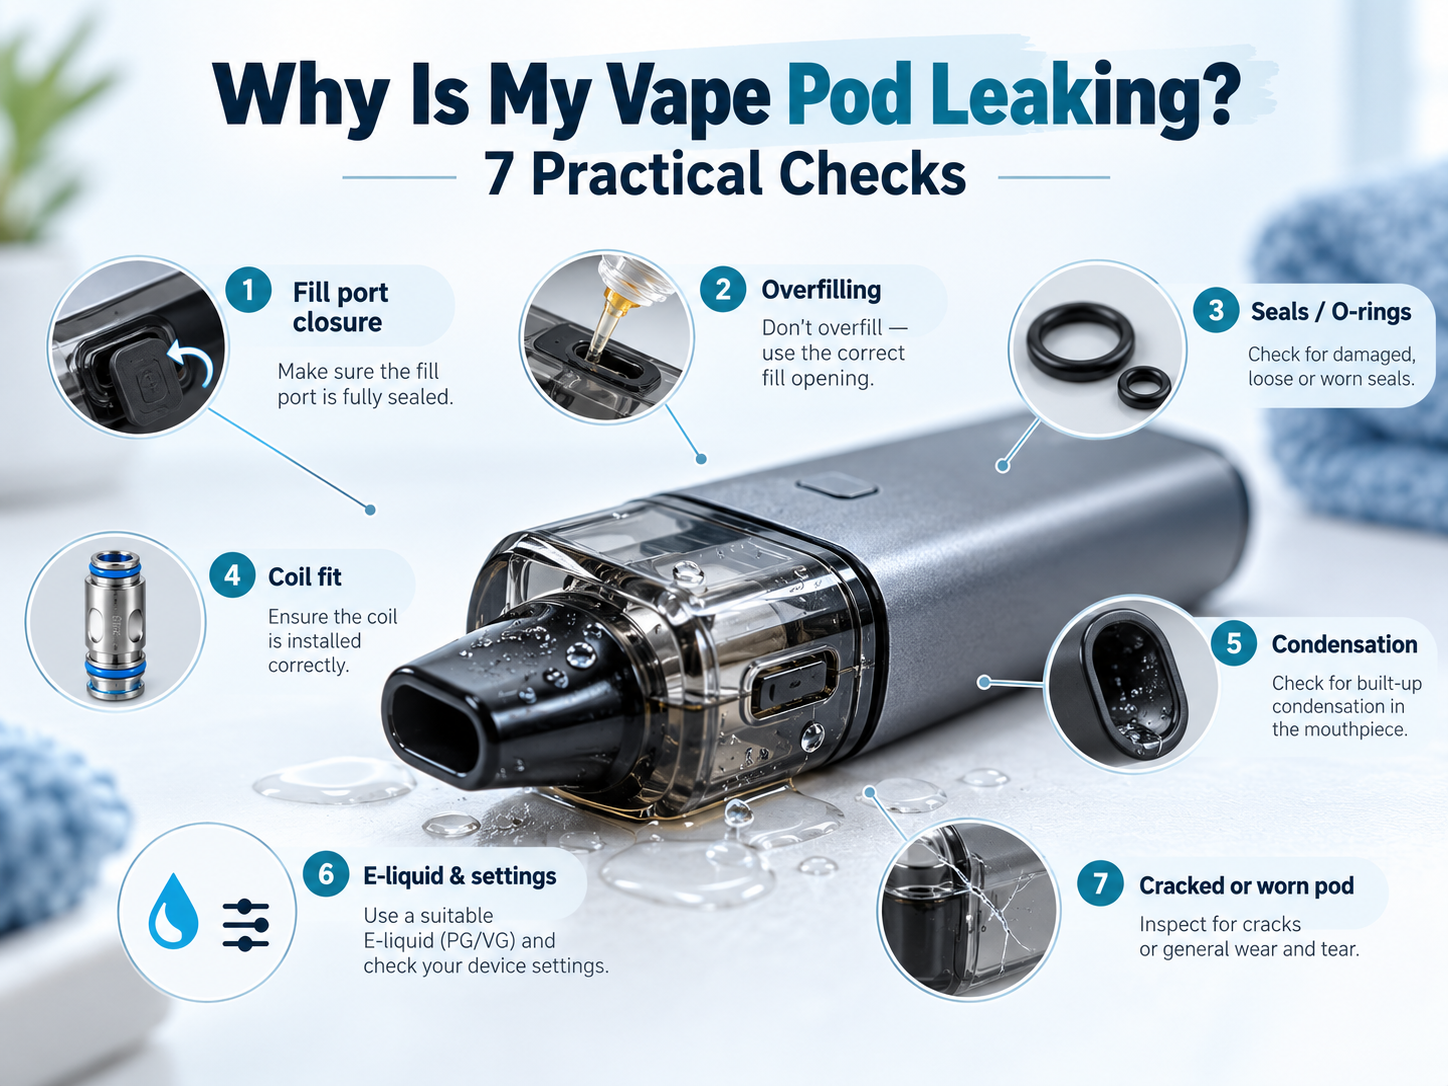
Why Is My Vape Pod Leaking?
Liquid around a pod can come from a reservoir leak, a filling spill or condensation in the mouthpiece. Its location helps you decide what to inspect, but does not establish the cause on its own.
Switch off the device and disconnect charging power before checking accessible parts. Only remove a pod or coil if the instructions allow it. If liquid may have entered the electronics, do not keep using or charging the device while investigating.
First locate the liquid
| Where liquid appears | What to check first |
|---|---|
| Around the fill port | Spilled liquid, stopper position and fill level |
| Along a reservoir seam | Cracks, deformation or failed seals |
| At a removable coil's base | Correct coil model, installation and seals |
| In the mouthpiece | Condensation or liquid entering the airflow passage |
| At the pod-to-device connection | Surface moisture and possible reservoir leakage |
| Inside the device or charging port | Stop use and charging; seek manufacturer guidance |
Keep liquid away from skin, children and pets. If liquid is swallowed or causes symptoms, seek prompt poison-centre or medical advice.
Seven practical checks
1. The fill closure is not secure
On a refillable pod, check whether the silicone stopper, sliding cover or cap is seated as designed. A damaged closure may leak when the pod moves, even if it appears closed at first glance.
Wipe permitted external surfaces with a dry, lint-free cloth, then close the port following the instructions. Replace a damaged closure or pod with a supported component. Do not tape or glue it shut, and do not try to open a sealed prefilled cartridge.
2. The pod was overfilled or the wrong opening was used
Liquid put into an airflow passage can reach the mouthpiece or base. Filling past the stated limit can also interfere with the pod's liquid-control system.
Check the labelled fill opening and maximum level. Leave only the space the manufacturer specifies; do not assume every design needs the same air gap. If overfilling has occurred, follow the model's corrective procedure rather than activating the device to clear the surplus.
3. A seal is displaced or damaged
Accessible O-rings and seals should sit in their designated grooves without cracks, cuts or distortion. A failed seal can allow liquid to escape at a joint.
Refit or replace only user-serviceable parts and use the specified replacements. A similar-looking seal may have the wrong size or material. Cleaning the outside cannot repair a failed seal or a broken reservoir seam.
4. A user-replaceable coil is fitted incorrectly
Some pods accept a replaceable coil; others have an integrated heating assembly. For the replaceable type, confirm the exact coil family and the intended push-fit or threaded installation.
An incompletely seated or incompatible coil can leave a poor seal. Install it only as instructed, without force or overtightening. Do not remove an integrated coil or alter a cartridge that was not designed for servicing.
Separately, confirm that the pod is correctly seated in the device. Seating matters for operation, but a magnetic fitting alone does not prove where liquid came from.
5. Condensation or residue looks like a leak
Aerosol can leave droplets in a mouthpiece or airflow path. A small amount of accessible moisture after use may therefore differ from liquid escaping through a reservoir seam.
Clean only the accessible areas the manufacturer permits. Recurrent wetness accompanied by a falling reservoir level, gurgling or droplets entering the mouth needs further inspection. Do not decide that liquid is harmless condensation solely from its appearance.
Aspire's troubleshooting examples distinguish filling, seal and condensation problems. These examples are useful for recognising possible causes, while the exact cleaning method depends on the pod design.
6. The liquid or operating setting is unsuitable
Check the device and coil instructions for liquid compatibility. PG/VG proportion influences viscosity, but no single ratio is correct for every pod.
If power is adjustable, keep it within the exact coil's operating range. Do not raise wattage outside that range to burn off pooled liquid. Changing the formulation or setting will not repair a crack, failed seal or loose fill closure.
If leakage began after a change of liquid or operating mode, note the change when contacting support. That timing is a clue, not proof of the cause.
7. The pod is cracked, deformed or worn
Inspect accessible reservoir surfaces in good light. A drop, damaged seam or worn closure may lead to persistent liquid loss.
Stop using a visibly damaged pod and replace it with a compatible part. If a supported replacement leaks in the same way, seek help with the device, filling method and liquid specification instead of repeatedly replacing pods without checking the cause.
A safe sequence for checking a wet pod
- Switch off the device and disconnect it from charging power.
- Remove the pod only if its instructions permit removal.
- Identify external residue, a reservoir leak or suspected liquid inside the electronics.
- Inspect the permitted fill closure, seams, seals and replaceable coil.
- Clean allowed external surfaces and correct only the installation issues covered by the instructions.
- Replace damaged consumables; obtain support for persistent faults or suspected electronic damage.
Drying the surface does not establish that a device with liquid inside it is safe to use again. Do not rinse the battery unit, heat it to dry it or blow liquid deeper into the device.
When to stop using the device
A cracked pod, continuing leak, liquid in the charging area or suspected electronic ingress requires a stop and a product-specific assessment. Abnormal heat, swelling, smoke or uncontrolled activation also requires stopping use. Do not handle a smoking or burning device; keep clear and contact emergency services.
For general battery care, follow the FDA's vape battery guidance and the device instructions.
Use an appropriate collection service for used pods and devices. EPA guidance for individuals explains the battery and residual-nicotine hazards of e-cigarette waste in the United States. Disposal arrangements elsewhere should be checked locally.
Choosing a replacement
Match the device's exact model and hardware revision to the manufacturer's pod or coil list. Similar appearance, the same resistance value or the same brand name does not guarantee interchangeability.
For related gurgling, flooding and spitback symptoms, see the coil troubleshooting guide. The tank maintenance guide covers care of user-serviceable tank components.
Frequently asked questions
Why is my pod leaking from the bottom?
Possible causes include liquid at a coil seal, a cracked reservoir or moisture collected around the connection. Inspect the accessible parts with power off. The location alone does not identify the fault.
Why does it leak straight after refilling?
Check the correct fill opening, specified fill level and closure. Filling spills and a damaged stopper can produce similar symptoms.
Can I keep using a pod that leaks a little?
Pause use until the cause is addressed. Do not use a visibly damaged pod or a device with suspected liquid inside the electronics.
Will a different PG/VG ratio fix it?
Only a compatibility problem might respond to an appropriate liquid change. A new formulation cannot repair a damaged seal or reservoir.
Can I fix the problem by increasing power?
Do not use increased power as a general leak repair. Check the exact coil's supported settings and correct the underlying fault.
Does leakage mean replacing the whole device?
Not necessarily. A compatible replacement pod may resolve a consumable fault if the device is undamaged. Suspected electronic ingress or faults that persist with a supported replacement need manufacturer assessment.
Adult use notice
This information is for adults of legal vaping age. Nicotine is addictive, and vaping is not risk-free. Keep devices and liquids away from children and pets. Follow manufacturer instructions and the laws that apply locally.